This document has just been completed in time for this workshop, and has not yet been proofread.
Add a Resource
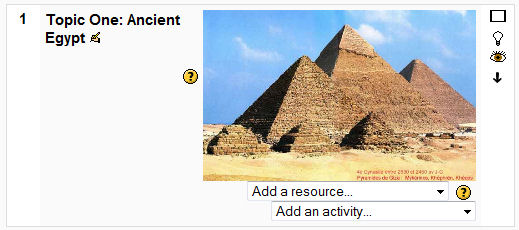
Whenever Editing Mode is activated, two selection lists appear within each content block. At the left or on top appears the list for 'Adding a Resource', while at the right or below appears the list for 'Adding an Activity. In Moodle usage, 'resources' are the documents you wish to post for your students and 'activities' are the interactive activities in which you want you students to participate, such as forums, tests, polls, wikis, etc.
 |
 |
Many different methods of postings documents are listed in the menu, but we will only be covering the four most immediately useful: Composing a web page on-line, making a link to a file that you have uploaded, making available an entire directory you have placed on-line and inserting descriptive labels to describe your documents and to give instructions.
 |
Composing a Web Page
The dialogue box which open whenever you make this selection contains
three important elements:
Name is an obligatory field. This title will appear on
your opening page as the name of the link.
Summary is an optional field. The summary only appears
in a particular situation: When students click on the 'Resources' link
in the 'Activities' block (if visible) or on the breadcrumb bar. Do
not make the mistake of placing your content here, as the majority of
your students will never see it!
Full Text is also an obligatory field. It is here that
you will compose the actual text of the page.
 |
While you are certainly free to start typing, is may be much more efficient to assemble your document by 'copying and pasting' elements from documents you already have. Note, however, that this technique does not bring along any images you may have in the original. Images would have to be inserted manually [See the technique under Improving the Look of your Page.] If your document contains many images, the 'Compose a Web Page' approach may not be the best one to choose.
 |
 |
An important consideration is whether the document should open in the same window, replacing the Moodle opening page, or in a new, additional window. It is suggested that you have your documents open in a new window. In this way, students will not lose their place on your opening page and can have several different documents open at the same time.
 |
|
 |
You simply need, then, to save your changes and a new link will appear on your top-level page. For any subsequent modifications, use the 'edit' icon next the the document's link. Please note that using the 'erase' icon will remove your document immediately and completely, without any hope of retrieval. (This is not the case with the next method, described below.)
 |
 |
Link to a File or Web Site
Elements common to all 'Add a Resource' dialogues are not repeated
here. (See above.)
The field Location must be filled in.
If your link is to a Web site, simply write or pastein the URL and
continue.
If, on the other hand, you wish to make a link to a file that is on your
Moodle site, click on the button 'Choose or Upload a File' to begin the
process. (This process could inlude up to three more screens, which
will appear and then disappear in reverse order.)
 |
 |
The first window is onto the list of files that you already have on your site. If the file you wish to post is already on thelist, you have saved several steps. (It is wise to upload all or many of your files beforehand, at one time.). If the file you wish to use is not present, click on the button 'Upload a File'.
 |
The next window is an intermediate dialogue page. You can upload the file whose address appears in the box. First, however, you must click on 'Browse' to locate the file on your computer. Once the location appears in the box, you may click on 'Upload this File'.
 |
| (Look in Improving the Look of Your Page for an explanation of the Browse window.) |
|---|
 |
Once the file is on the list, click on 'Choose', at the right, to select the file.
 |
Which returns you to the original window. Proceed to select 'New Window' (Recommended) and to save your changes.
 |
Your new link now appears on the opening page. The 'edit' icon in this case only modifies the link itself, not the original documents. Any modifications to the document must be done on your computer and the updated file uploaded. For such updates, it makes the most sense to keep the same file name. In that case, you need only replace the existing file with the new one; there is no need to modify the link in any way. If you use the 'erase' icon, you are only erasing the link; the original document remains unchanged among your files on the site. On the other hand, you cannot erase the file, or even move it, as long as there is an active link pointing to it.
 |
 |
Displaying a Directory
The mechanism that Moodle provides to allow you to upload many files at one time is via a ZIP archive. (In XP or Vista, you may create such an archive simply by right-clicking and selecting a new, compressed folder.) Once uploaded, Moodle recognizes such files and gives you the tools to 'uncompress' them.
 |
 |
 |
(You should probably erase the intermediate ZIP file when done, as it serves no further purpose and just takes up space.)
Select 'Display a Directory' from the 'Add a Resource' menu and select your directory. Never display your root directory as students would then have access to your entire site. All access is 'read-only', of course.
 |
 |
The link to your on-line folder now appears on the list. For updates, you simply need to load new files into your folder. The names of the files, however, should be clear as they will be the only clues to their contents.
 |
 |
Adding a Label
Through the use of what Moodle calls 'Labels', you may add blocks of text, images, additional links, etc in among your documents. These labels allow you to describe the documents more fully and to give specific instructions as to their use and purpose.
 |
Often a new label will not appear where you want it to be. All new items appear at the bottom of the list in each block. Use the 'Move' icone to place the label where you want it to be.
 |
Click, then, within the box that represents the desired location. You can do nothing else at this point; all other operations are blocked.
 |
You can also use the right arrow to indent links to various levels of indentation. In this way, you can impart a visual structure to your list of documents, grouping like things together in a meaningful way.
 |
Topic 1 is now done. All the links and labels have been added.
 |